重ね合わせあれこれ
スタックをつくる
TIFF形式は一つのファイルの中に複数の画像をいれることができます。ImageJではstackといいます。
<?php
$files = glob("dir/*.tif");    // スタックに使用するファイルを取得
$img_base = new Imagick(array_shift($files));
foreach($files as $file){
    $img = new Imagick($file);
    $img_base->addImage($img);
}
$img_base->writeImages("out.tif", TRUE);    // writeImageではないことに注意
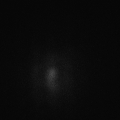
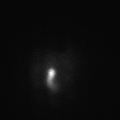
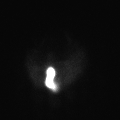
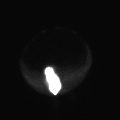
最大輝度値で重ね合わせる
ImageJでいうZ projectionです。
<?php
$files = glob("dir/*C1.tif"); // 重ね合わせに使用するファイルを取得
$img_base = new Imagick(array_shift($files));
foreach($files as $file){
    $img = new Imagick($file);
    $img_base->compositeImage($img, Imagick::COMPOSITE_LIGHTEN, 0, 0);
}
$img->writeImage("output.tif");

 =>
=>

チャネル別の写真を合成する
グレースケール(白黒)画像を赤、緑、青の画像として重ね合わせます。
<?php
$red = new Imagick("circle_red.jpg");
$green = new Imagick("circle_green.jpg");
$blue = new Imagick("circle_blue.jpg");
$red->compositeImage($green, imagick::COMPOSITE_COPYGREEN, 0, 0, imagick::CHANNEL_ALL);
$red->compositeImage($blue, imagick::COMPOSITE_COPYBLUE, 0, 0, imagick::CHANNEL_ALL);
$red->writeImage("circle_color.jpg");


 =>
=>

画像の大きさあれこれ
一部をきりとる(余分な部分を捨てる)
トリミングと呼ばれることです。
<?php
$img = new Imagick("file");    // 処理対象のファイルを読み込みます
$img->cropImage(width, height, origin_x, origin_y);
$img->writeImage("output");
拡大・縮小
<?php
$img = new Imagick("file");    // 処理対象のファイルを読み込みます
$img->resizeImage(width, height, NULL, NULL);    // フィルターとかblurとかを設定しない
$img->writeImage("output");
画質を調整する
明るさのヒストグラムを作成する
明るさやコントラストを調整するための基本情報を取得します。
<?php
$img = new Imagick("file");
$hist = array('r' => array(), 'g' => array(), 'b' => array());
foreach($img->getImageHistogram() as $pixel){
	$intensity = $pixel->getColor(TRUE);
	foreach(array('r', 'g', 'b') as $color){
		$hist[$color][$intensity[$color] * (pow(2, $depth) - 1)] = $pixel->getColorCount();
	}
}
foreach(array('r', 'g', 'b') as $color){
	$ave = $max = $tot = 0;
	$min = pow(2, $depth) - 1;
	foreach($hist[$color] as $intensity => $count){
		$tot += $count;
		$ave += $intensity * $count;
		$min = min($min, $intensity);
		$max = max($min, $intensity);
	}
	printf("$color: mean = %d, min = %d, max = %d\n", $ave / $tot, $min, $max);
}
出力例 (グレースケール画像なのでRGBが同じになっている)
r: mean = 3478, min = 2794, max = 5403
g: mean = 3478, min = 2794, max = 5403
b: mean = 3478, min = 2794, max = 5403
レベル調整をする
<?php
$img = new Imagick("16bit_grayscale.tif");
$img->levelImage(2500, 1.0, 5500, imagick::CHANNEL_ALL);
$img->writeImage('out.tif');